How to 'Alter' Transmetal 2
MEGATRON

Lets face it, as cool a toy as it is the toy needs fixing!   Here's how I altered mine.  If you haven't seen it already, click HERE.  I'll start by describing the minor stuff.
First the wings.  I really like the purple on them but in robot mode and w/ light shining from behind it doesn't look like that cool purple.  It looks like a dingy ugly grey on top of that awesome flourscent orange.  I took the purple off and personally, I think it looks better.  To remove it, I first took the wings apart.  With each of the six orange wing components I used a small amount of nail polish remover on a cotton ball and tediously rubbed until it came off.  It takes quite awhile and don't use too much nail polish remover.  The n.p.r. also takes off the clear finish of the clear orange plastic, but if you only put it in the spots w/ purple paint, it only dulls those areas and the rest stays nice and shiny.
I altered the head by first painting the clear portion of the clear orange plastic on the head cover so it looks like the show.  Then I used the molding epoxy and added the spike/claw things to get rid of the silly vents on the sides of his face.  Using magnification, I very carefully resculpted the shark teeth to make them look flattened like in the show.  When I was done with all the re-sculpting, I painted everything that needed it for the final look you see in the pictures.
Now the MOST important part!  That dang unposable rubber dragon neck!  This was tricky but fun and DEFINATELY worth the effort!   First, I detached the shoulder from the rest of his body.  I then disassembled the bulky rigid upper-arm portion (pay close attention w/ this because you'll need to reassemble it when you're done).  I also removed the dragon head and upper neck 'plating' so all I had was just the flexible rubber portion.  Using a long thin drill bit I drilled a small continuous hole through the bottom portion of the neck.  Be REALLY careful here so the drill bit doesn't poke through.  You'll see the only 'solid portion I used when you get to this part.  I'll be obvious.
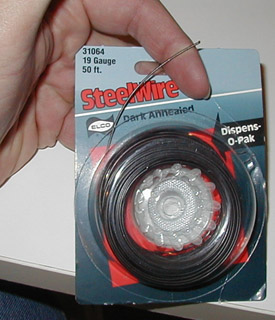
I bought the SteelWire you see in the picture here at my local hardware store.  It's sold there as a sort of 'roping' for hanging large picture frames! (really) 

I cut three long pieces and carefully and tightly braided them together so it was thicker and would hold it's position better but so that it was still flexible to bend without having to use too much force.

I carefully pushed this braided steel wire through the hole I had drilled in the rubber portion of the neck so that there was an inch or so on

megwire.jpg (39847 bytes)
each end.  You have to secure the wire on each end (I used a small amount of epoxy) so it won't come out, then carefully put the dragon head back on and reassamble the rigid upper arm!  Good luck!  It's tough!
Like I said, it's definately worth the effort.  Being able to pose that dragon neck is so important in BOTH modes that it just makes the toy SO much cooler if it holds it's position when you put it.  Have fun and be sure to send me pics of how your's turns out!

-Perceptor@unicron.com